

Front Porch Styling Made Easy: DIY Hydrangea Wreath with Pumpkins and Mums

As the air turns crisp and the light grows golden, there’s no better way to greet fall than with an elegant hydrangea wreath styled alongside fresh pumpkins and mums on your front porch. We believe in embracing the beauty of the season with effortless touches that make a statement and these lush hydrangea wreathes are just that. Even better? They are simpler to create than they look.
What You’ll Need:
For the Wreath
Freshly cut hydrangeas (about 20–30 stems, depending on wreath size)
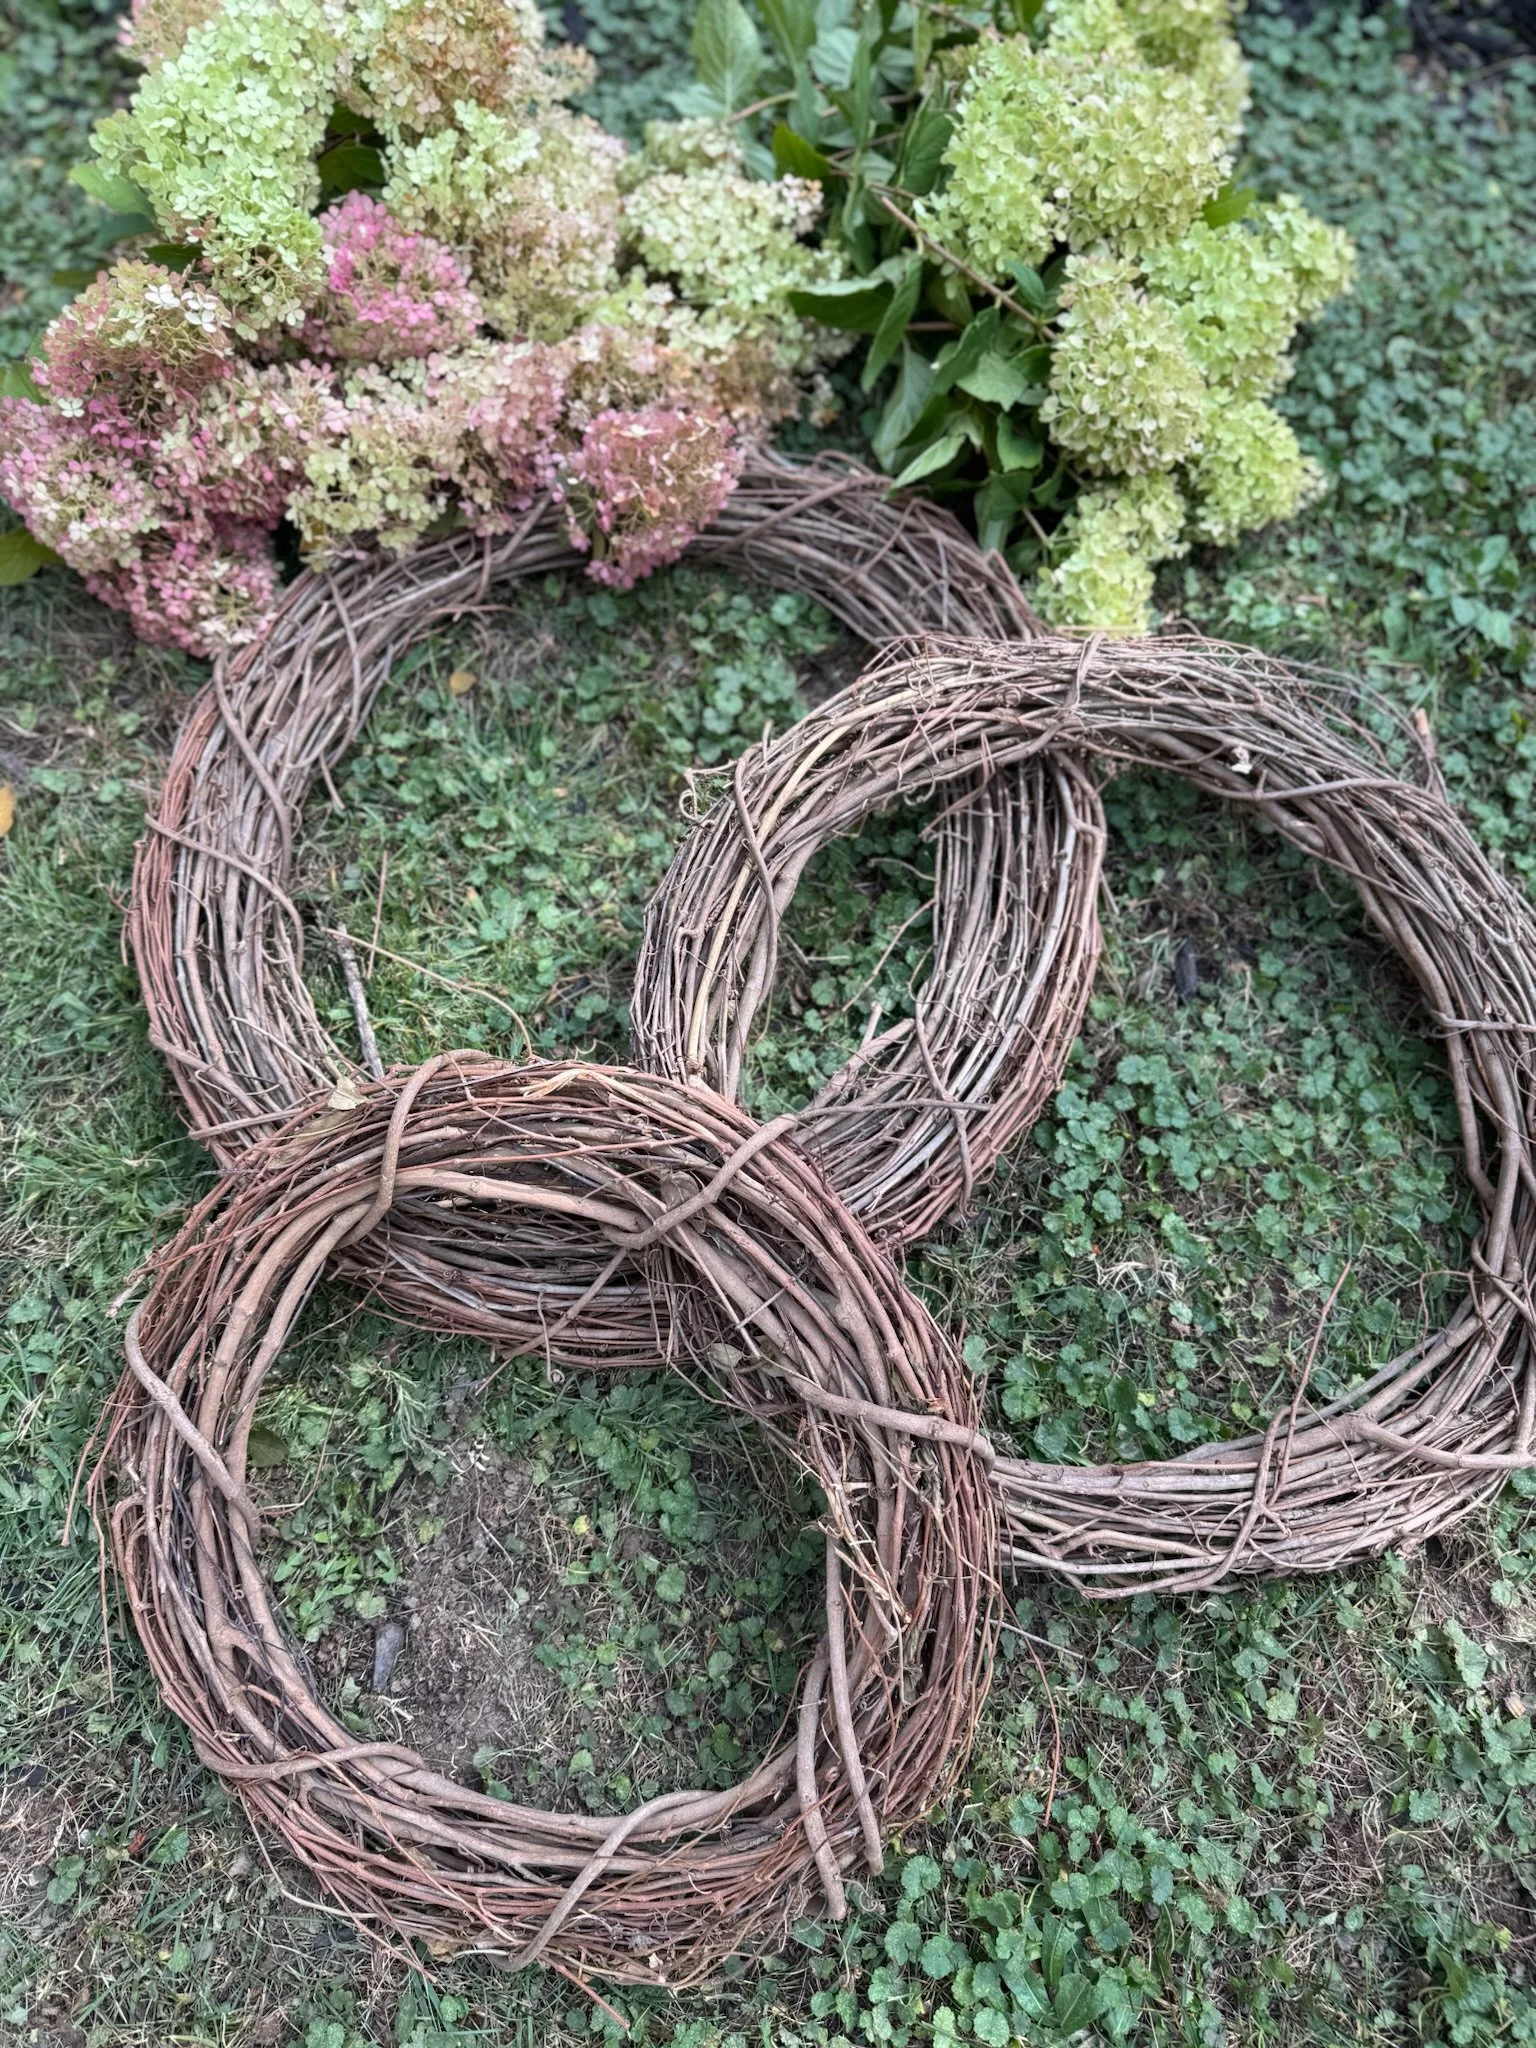
Grapevine wreath form (18”–24” works beautifully)
A Bucket
Garden shears or clippers
Hairspray (any unscented drugstore brand will do)
For Styling
Assorted heirloom pumpkins (we love a mix of soft greens, creams, and warm oranges)
Potted mums in fall tones (yellow and burgundy)
Step 1: Harvest and Prep the Blooms
Gather your hydrangeas — ideally in the late morning after dew has evaporated. Choose blooms that are mature but not fully dry. Cut stems to about 6–8 inches and remove excess leaves.

Step 2: Wash the Stems
To prepare hydrangeas for wreath-making, try dipping the blooms into water to clean off bugs and debris. This helps clean the stems, making them easier to work with.

Step 3: Dry Out the Blooms
After dipping hydrangea blooms in water to clean them, let them dry completely. This step helps the flowers dry properly, ready to be used in your wreath.
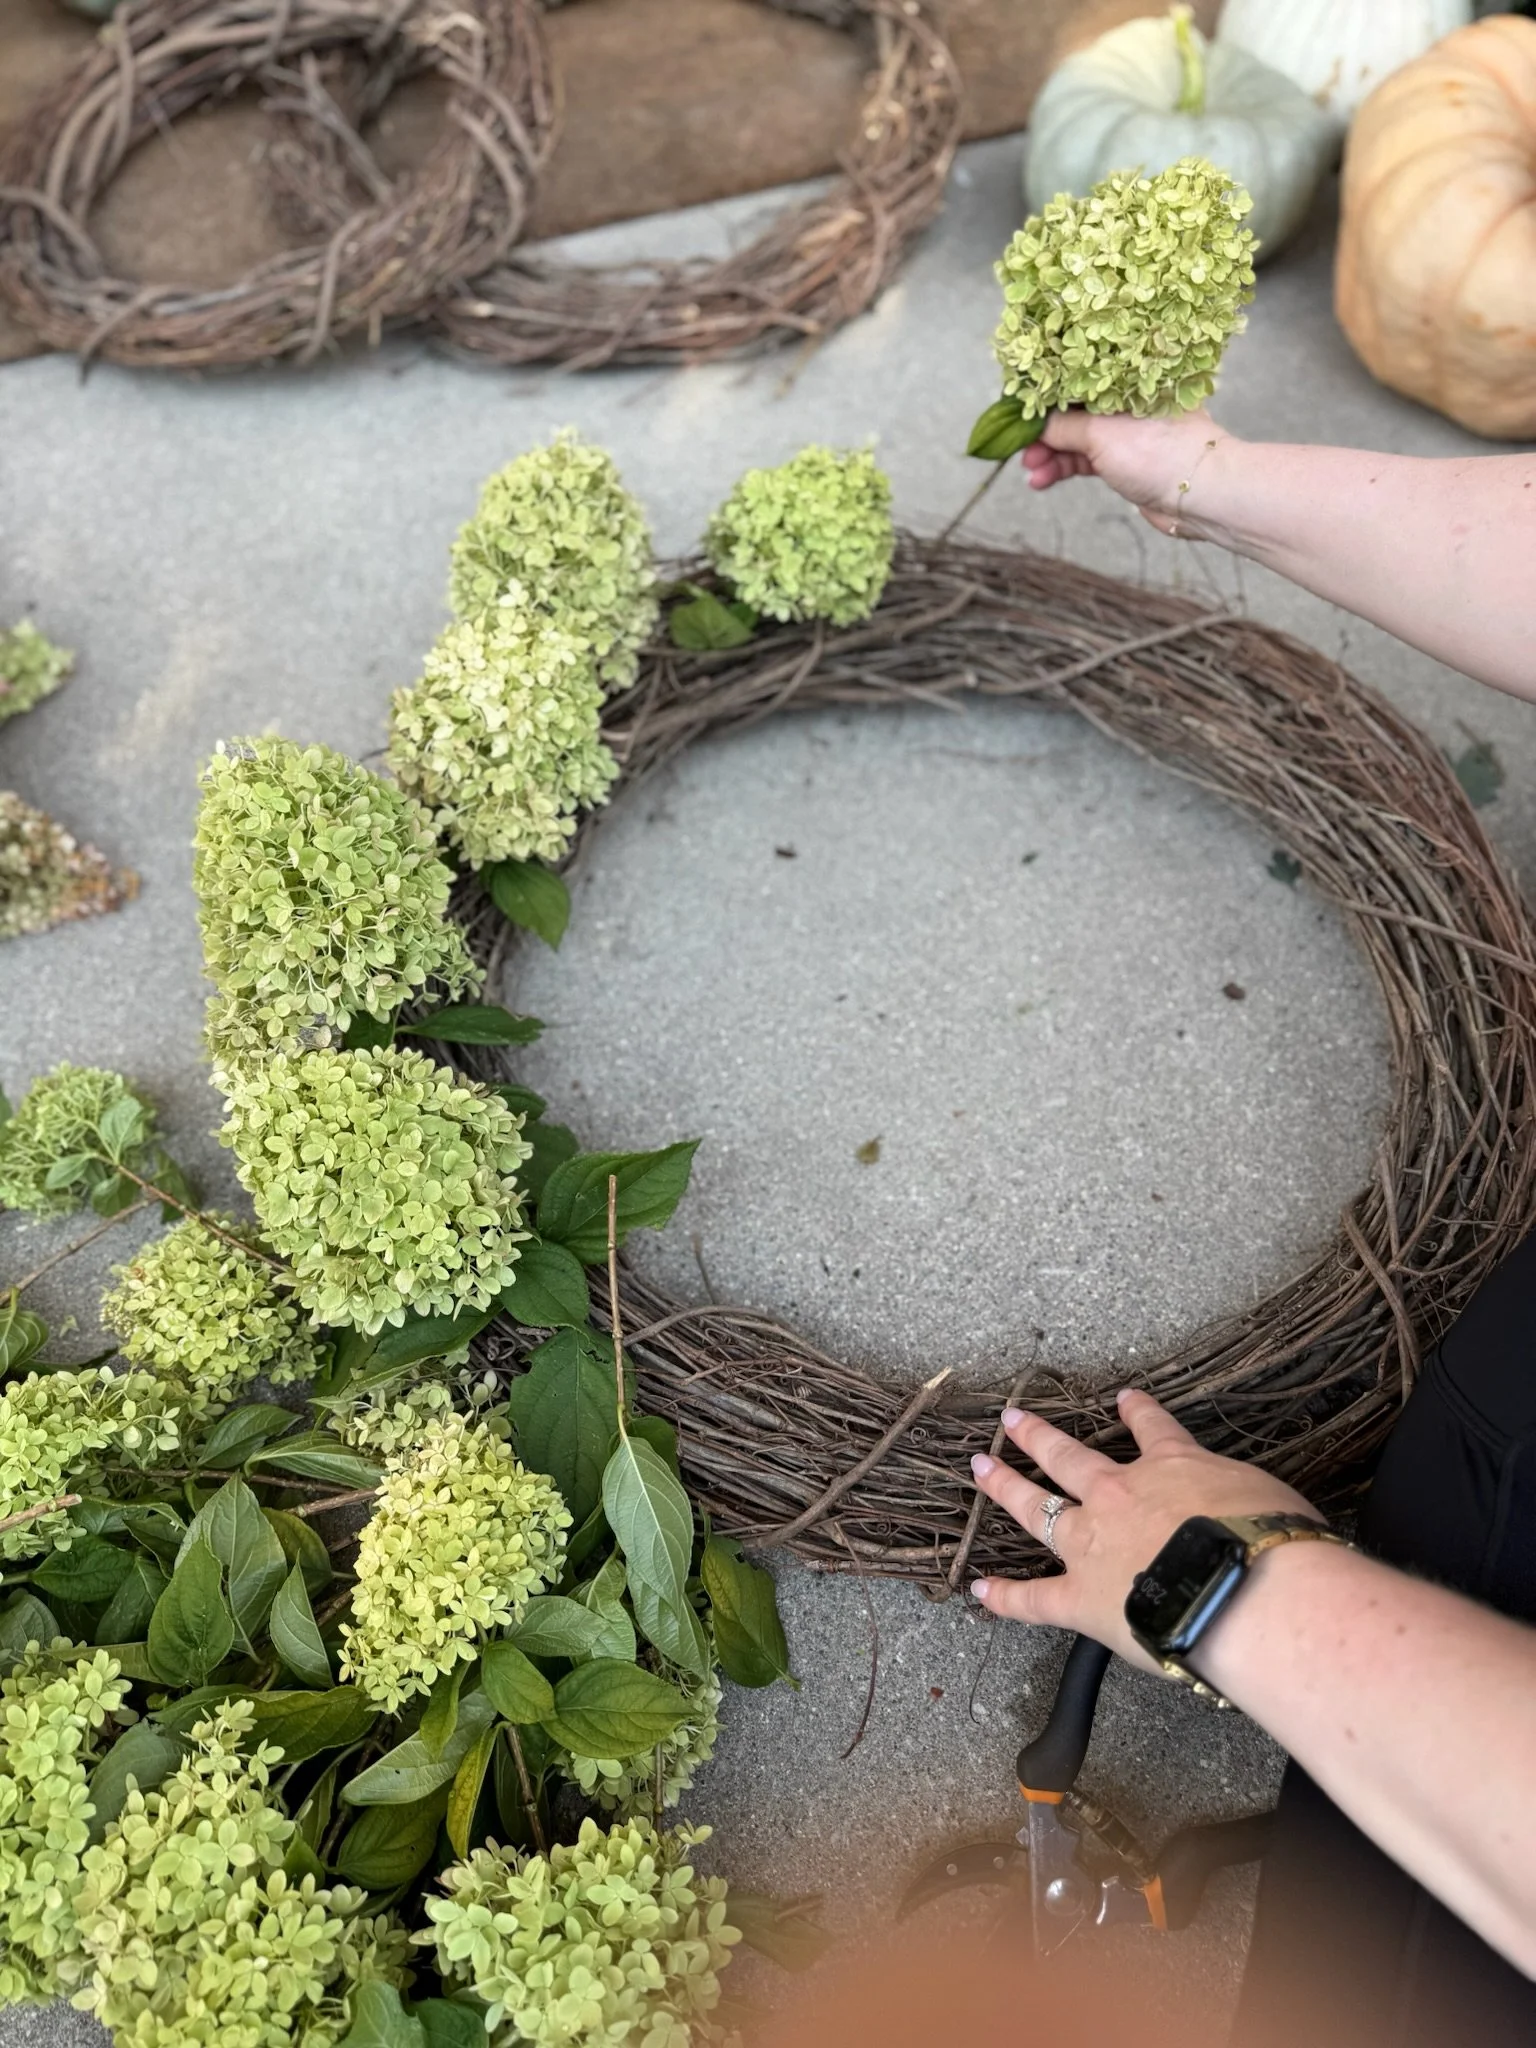
Step 4: Assemble Your Base
Lay your grapevine wreath flat on a work surface. Starting on one side, gently insert the hydrangea stems into the natural tangle of the grapevine. Secure with floral wire if needed.
Work in one direction around the wreath form, overlapping blooms slightly to create fullness. Vary the placement for a natural, organic feel.
Don’t worry about perfection. Part of the charm is its wild look.
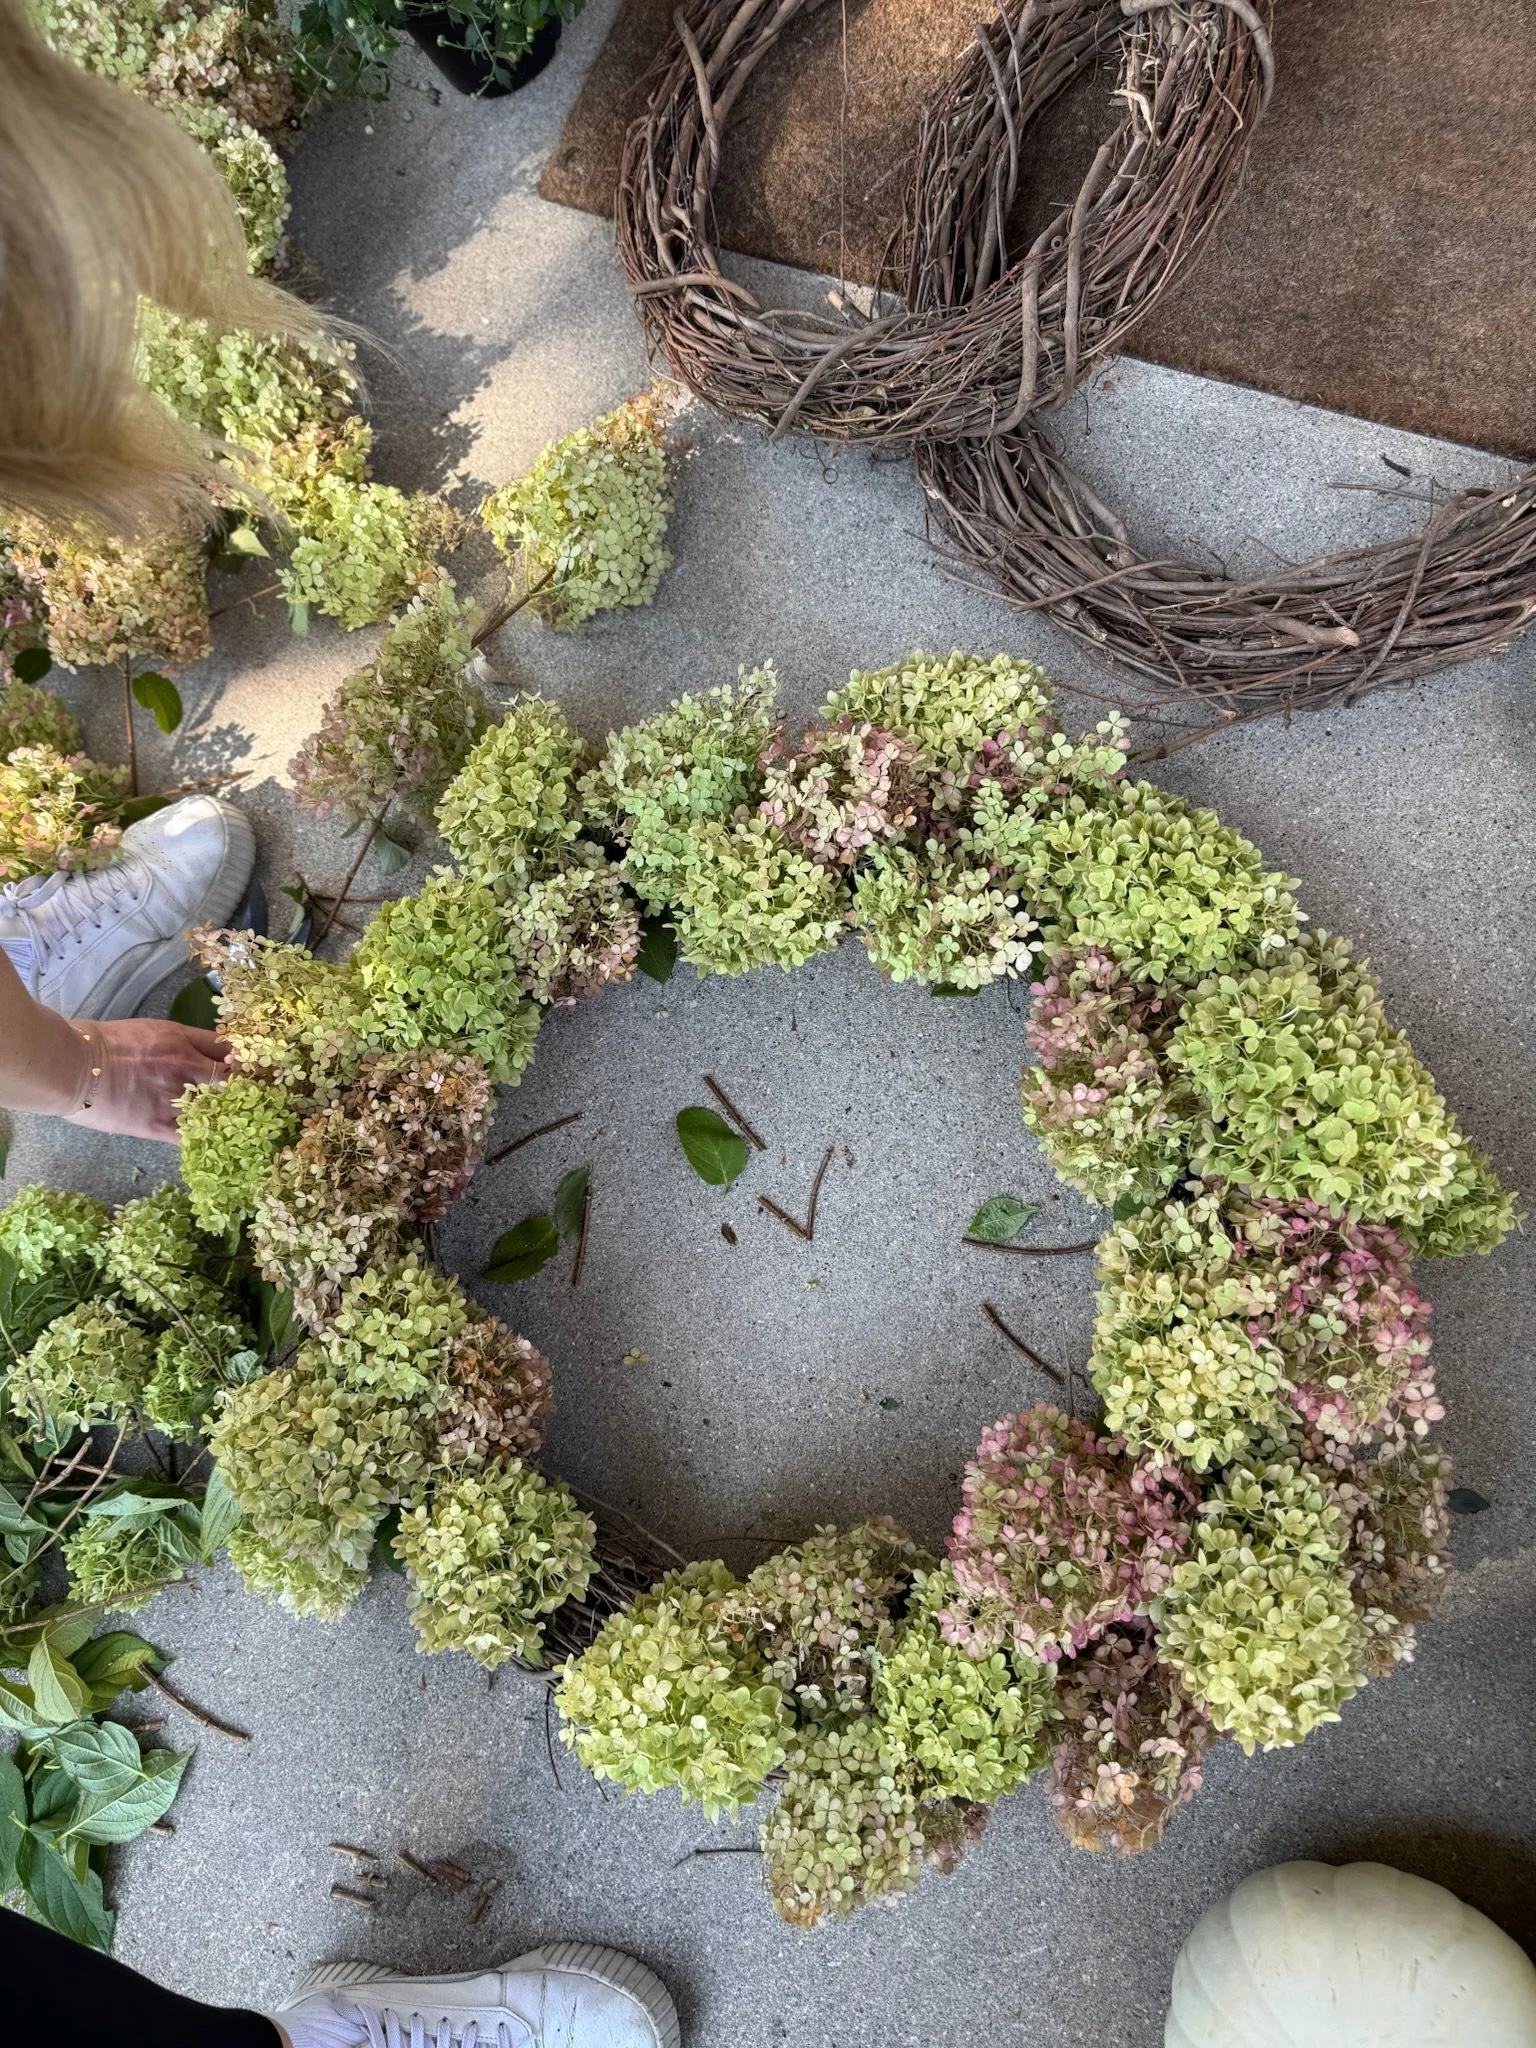
Step 5: Secure and Shape
Once all the blooms are in place, step back and fluff the wreath. Fill in any gaps with smaller clusters or individual petals. Secure any loose stems with additional wire. Give it a spritz with hairspray to preserve the flowers.

Step 6: Hang and Style
Display your wreathes on a front door, over a mirror, or layered on a mantel.
Step 7: Complete the Look
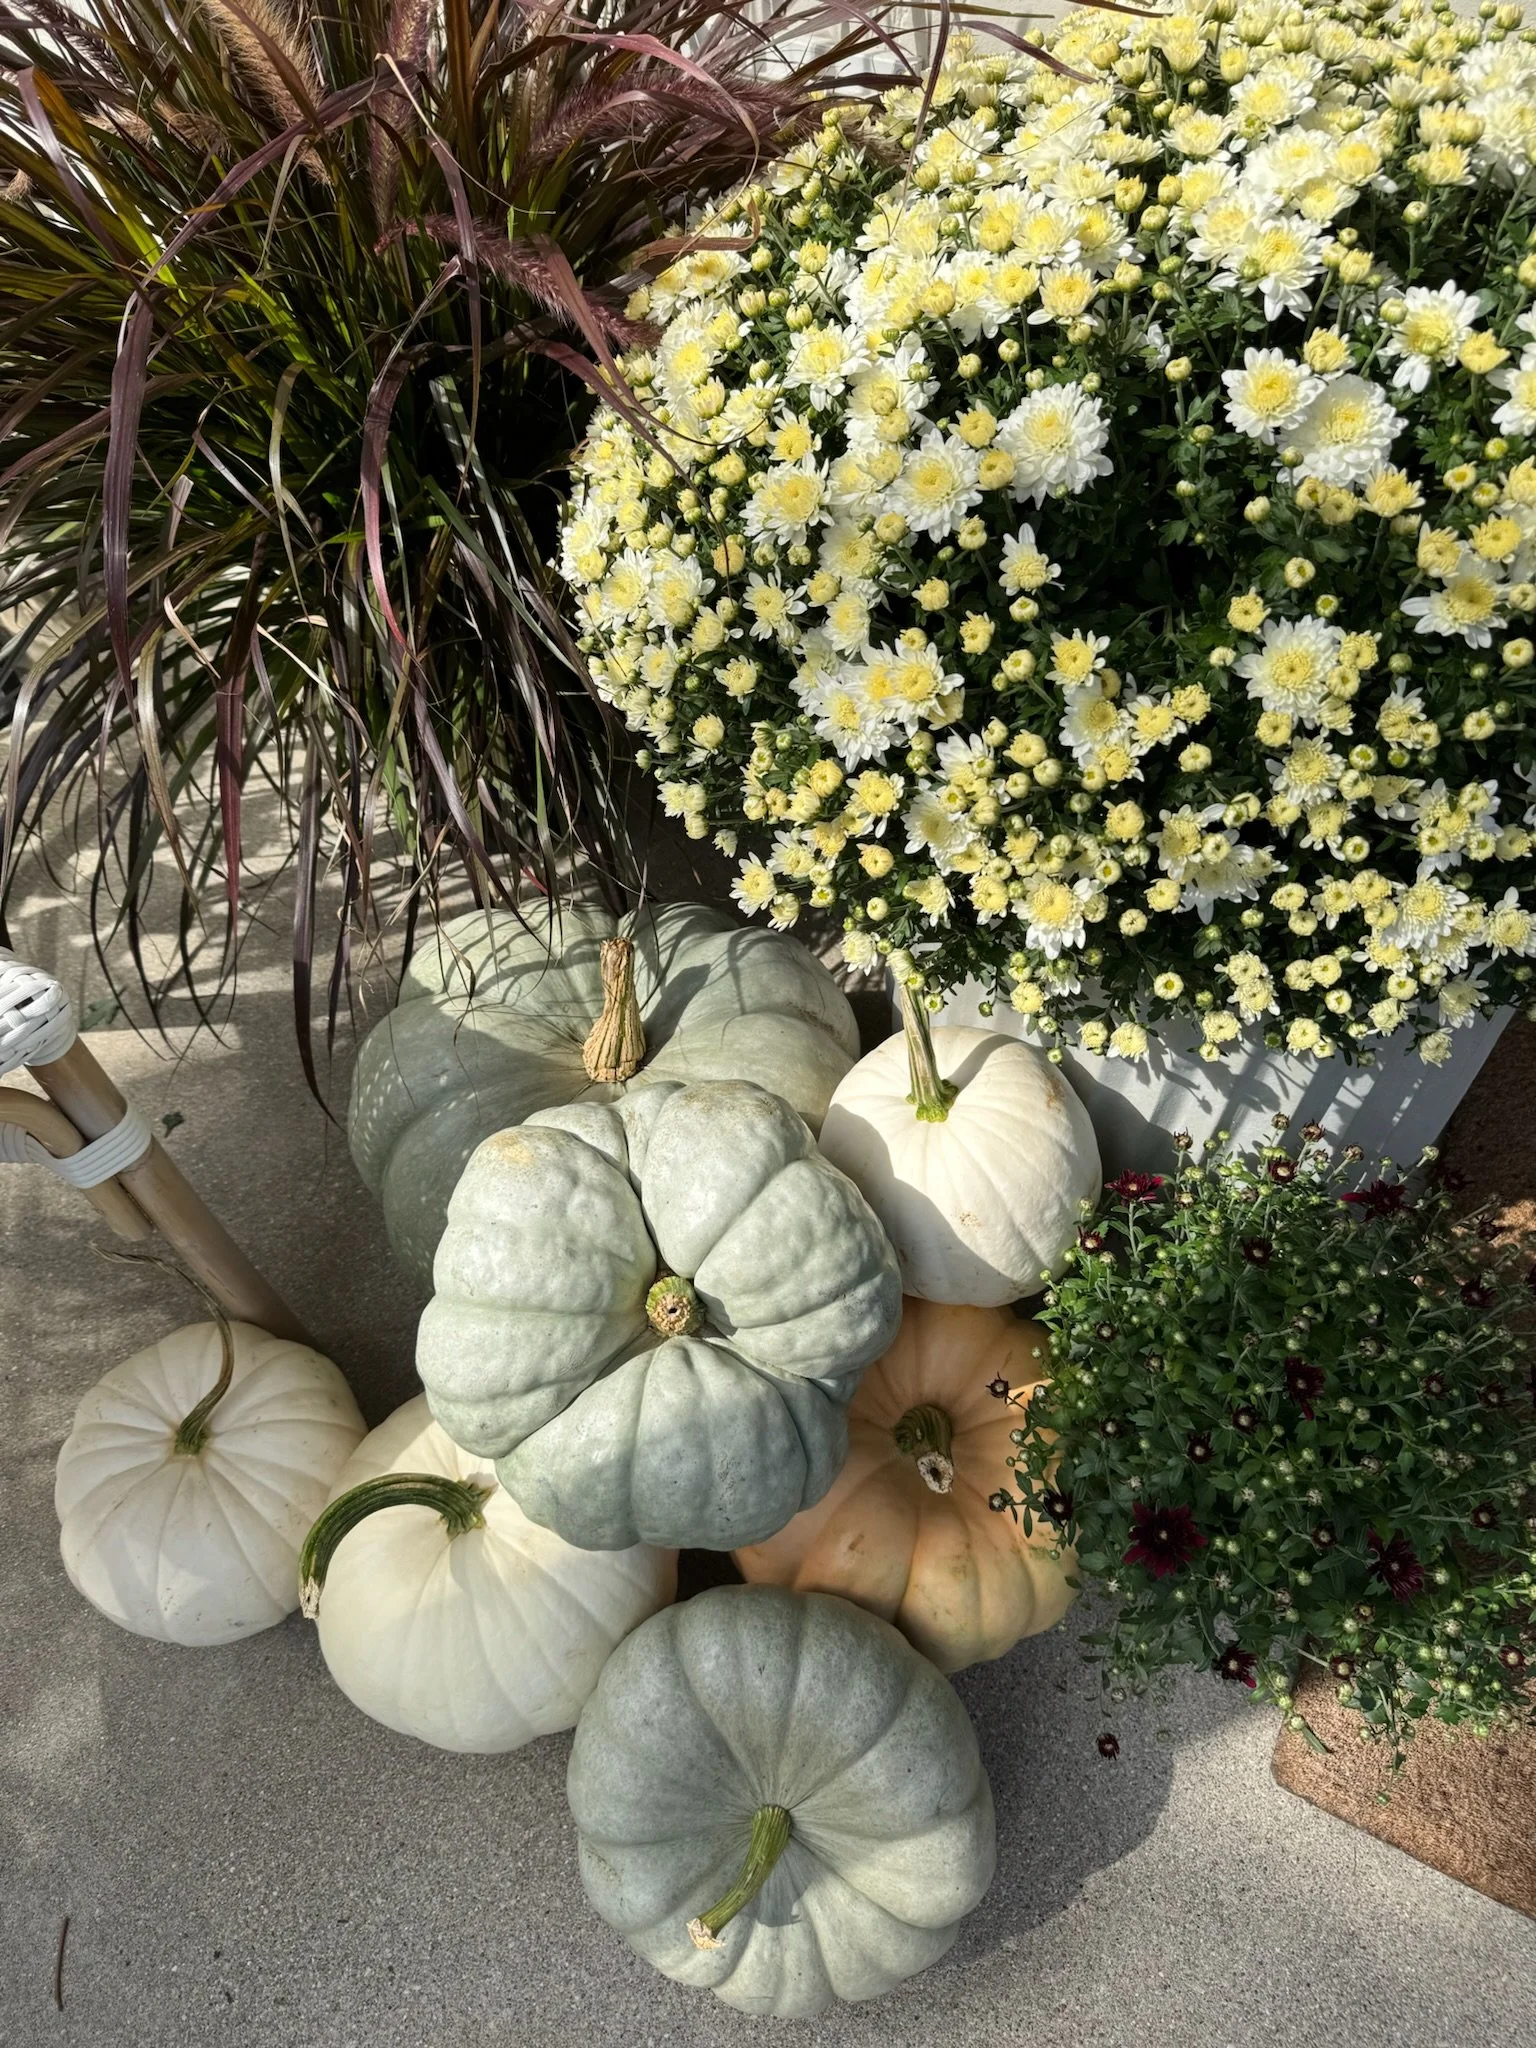
Set the tone by layering natural elements at your entry or patio. Here’s how we love to do it:
Stack heirloom pumpkins in varying sizes and tones for visual depth
Pro tip: wash your pumpkins with soap and water and spray them with a vinegar water mixture to keep squirrels from eating them
Cluster potted mums
Add in candles, lanterns, or a plaid throw for texture if styling a porch or seating area